


Table of contents
Think of the DOM (Document Object Model) as a family tree that tells you about your connections with your ancestors, cousins, aunts, nieces, and more. From my family tree, I discovered that I have an uncle from my mother's side. Anyway, the DOM goes beyond simply revealing hierarchical relationships between elements. It is a set of instructions that empowers us to interact with the web page (the Document) and customize it to our liking. With the DOM, you can transform your uncle into your next-door neighbour or even change the skin colour of your children or parents. The DOM is a powerful tool, but unfortunately, it can't help you become an Avenger.
To interact with our web page and make changes to its contents, we will use JavaScript in conjunction with the DOM. However, it's important to remember that the DOM is not JavaScript itself but rather a set of instructions that guide us on how to manipulate the document that contains our web page's contents.
Let's get started!
Accessing DOM Elements
Whether you have existing elements in your HTML that you want to modify using the DOM or want to add new elements to an empty page, the DOM can assist you in accomplishing these tasks.
Before we proceed, it's essential to have a basic understanding of JavaScript variables, keywords such as let and const, functions, and data types like arrays and objects. Also, CSS, why? At least, understand how id and classes are represented in CSS.
We can access elements on our web page by using HTML tags, CSS class names, or IDs. Here are some methods we can utilize:
document.querySelector()document.querySelectorAll()document.getElementById()document.getElementsByClassNames(),
We can modify or manipulate the DOM, such as its styles or content with methods such as:
document.createElement()document.appendChild()textContent
Examples
Let's explore some of the methods:
In the following HTML document, I created a structure with a div element having an ID of "wrapper" and another div with the class "inner-wrapper":
<body>
    <div id='wrapper'>
        <div class="inner-wrapper">
            Hello World!
        </div>
    </div>
</body>
document.querySelector
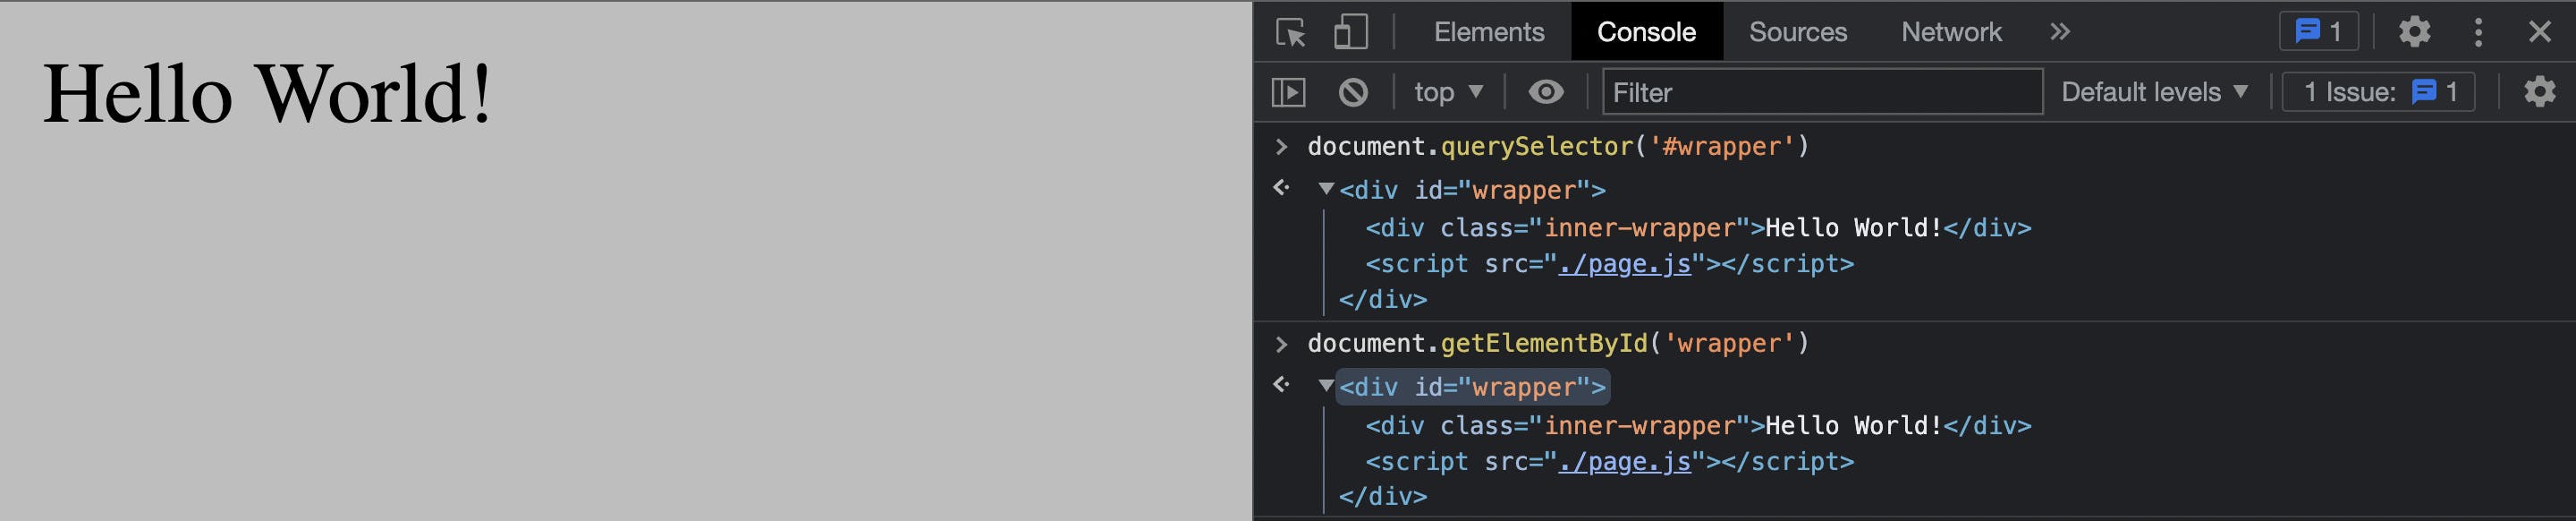
I will be using querySelector and getElementById to access those divs in the snippet above. This is because they are similar in behaviour as they can be used to select the element ids. However, document.querySelector can select much more than just ids. It can be used to select specific tags and attributes you just need to add the identifier as we did below. It depends on what we want to do. This makes it different from the getElementById one which only selects elements with ids just as its name implies.
const wrapper = document.querySelector('#wrapper');

const wrapperById = document.getElementById('wrapper');
I have created an index.html file to show examples. In the developer console, which you can access by clicking on the Option + ⌘ + J keys if you are using a MacBook and Shift + CTRL + J if you are on Windows.
You will notice both methods brought out the same result as I mentioned earlier. We selected the elements with the ids but there is one difference that I didn't mention above between both methods. The querySelector in defining it required us to put an identifier to what we are looking to select from the DOM but the getElementById already had the identifier in its naming(id) therefore, I just wrote the identifier name and it got the element we are looking for.
document.getElementsByClassName
In our next snippet, we will be using document.getElementsByClassName. As the name suggests, you are trying to get the elements, with emphasis on the s, to signify multiple elements. document.getElementsByClassName returns what we call an HTML Collection. An HTML Collection returns an array-like list of elements which means, you can use the indexing method to access any of the elements in the array. However, keep in mind that it is not an array as built-in array methods will not work on an HTML collection.
For example, our HTML structure above will return a single element in our array, because there is only one definition of inner-wrapper in that HTML structure.
const innerWrapper = document.getElementsByClassName('inner-wrapper');
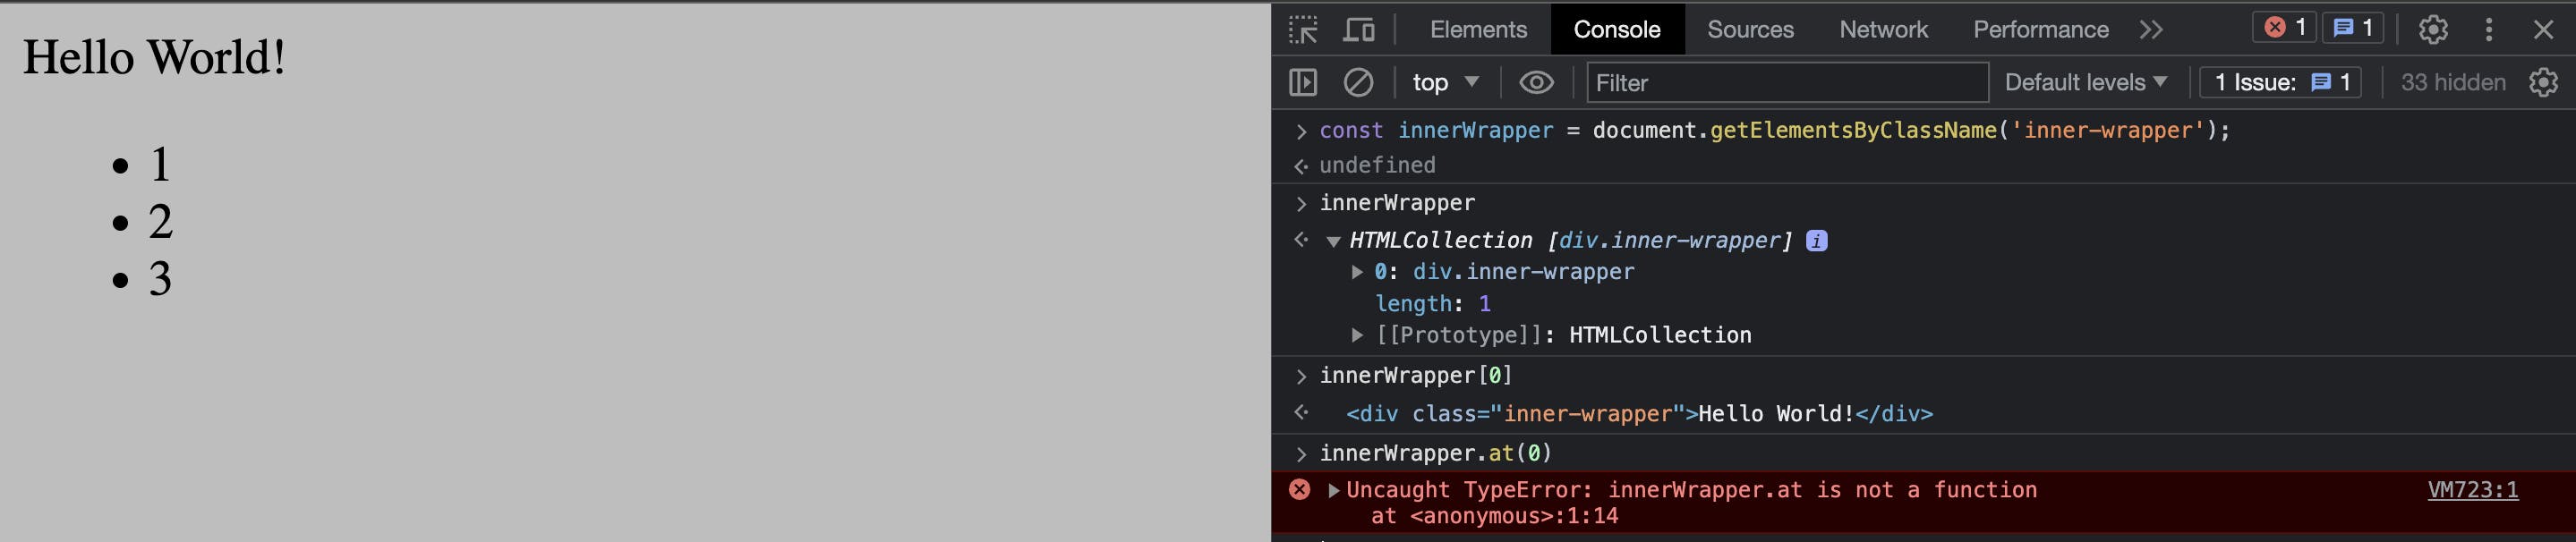
You can see in the image above, it says HTML Collection and the div we were looking for is right inside the array and you can see that I accessed the element inside the array using the array indexing method. You would also notice some red text complaining about something not a function. This is because I tried using an array built-in .at method. So, again, HTML collections are not arrays but they look like an array.
Let's use a different example where we will have more items in our collection.
<body>
    <div id='wrapper'>
        <div class="inner-wrapper">
            Hello World!
        </div>
        <ul class='list-container'>
            <li class='item'>1</li>
            <li class='item'>2</li>
            <li class='item'>3</li>
        </ul>
    </div>
</body>
In the snippet above, I have added more content to the HTML document. I have declared a ul tag along with its corresponding li tag and added a class attribute to them both. So, let's access the elements with the snippet below in our console.
const items = document.getElementsByClassName('item');
The image below shows us the result of calling the method above. It has returned our collection and I have applied the indexing method to get the second element in the collection.

document.querySelectorAll
In our next snippet, we will be using document.querySelectorAll. This also behaves like getElementsByClassName as it returns a collection of the specified element we are looking to return. This return a NodeList and not an HTML collection. Again, it is also not an array but looks like an array. So, don't even bother trying your array methods on them, you'll be very disappointed. Psst, don't say I didn't warn you.
const listByTag = document.querySelectorAll('li');
const listByClass = document.querySelectorAll('.item');


You can see in the images above, it says NodeList and the divs we were looking for were right inside the list. You can also see that I accessed the element inside that nodeList using the array indexing method. Using the map method threw an error like I pointed out. Sorry, Scott Lang, I told you so but you had to see it for yourself.
So, document.getElementsByClassName, document.querySelectorAll, document.getElementsByTagName all behave similarly, the only difference is what they return, a NodeList or an HTML Collection and the fact that you have to specify whatever identifier you want to select in the query selectors.
Manipulating DOM Elements
document.createElement
This is the guy that creates the element you want to add to the document. It is even in its name. This method can be used to create new tags that can be added to our document. Let's look at an example. So, I want to add a new paragraph to our HTML document, I will do that like below,
const newDiv = document.createElement('p');

I have created the div but you will notice there is nothing in my browser to indicate I have created a new div. Even if the new div is present in my browser, you wouldn't notice anything visually because it has no content. So, what I have to do is add some content to the new div and add it to the DOM. I will do it like below;
  const newDiv = document.createElement('p');
  newDiv.textContent = 'I am adding the first element I have created outside of my html file to the DOM';
  document.body.append(newDiv);
Don't be alarmed that you are seeing .body on the document. Well, it is a property on the document and it represents the body tag in your HTML file. So, what I am simply doing above, is telling the document to add the newly created div to the body of our document.
The append method is used to add the tag to the bottom of our body tag.

textContent
This particular method can be used to get the content and manipulate whatever element we have selected in the DOM.
In the image below, Using the querySelector, I have accessed the content of the first element in the nodeList and changed it into one of my favourite Avengers.

The last thing I will talk about is styling. Remember I mentioned skin colour in the first paragraph of this article. Well, we'll change the background of our inner-wrapper shortly and the colour of the list items.
const wrapper = document.querySelector('#wrapper');
wrapper.style.background = '#8c8cae'
wrapper.style.fontFamily = 'Arial'
wrapper.style.padding = '20px'
wrapper.style.color = 'white';

const list = document.querySelector('.list-container');
list.style.listStyleType = 'none'
In the image below, I have changed the background, font family, padding and colour of our div using the style property on the selected element and I have also removed the bullet points in the list element.

So, there are a lot of methods and things to learn from the DOM. We cannot exhaust them in this article as it is to introduce you to the DOM and the exciting thing you can do with the DOM.
In the next article, I will build a small app using the DOM so you can see it in a broader view...
Thanks for coming and reading my TED talk...
How'd I do?
You can also check MDN web docs to read up on some of those methods listed above as well as other methods you can use.